Disclaimer: The information provided in this article is for educational and informational purposes only. Making alcoholic beverages at home involves fermentation processes that must be done carefully and hygienically. We do not take responsibility for the outcome of your homemade brewing attempts, any health effects, or legal compliance in your area. Always consume alcohol responsibly. If you have underlying health conditions or concerns regarding alcohol or ginger consumption, please consult a qualified healthcare professional before consuming this beverage.
Ginger wine is a traditional, warming beverage that has been enjoyed for generations. Unlike grape wines, which rely on the natural sugars and juices of crushed fruit, ginger wine is made by fermenting a strong infusion of fresh ginger root, sugar, and yeast. The result is a crisp, spicy, and deeply flavorful drink that carries the unmistakable heat of natural ginger.
Making ginger wine at home is a rewarding process. It requires patience and attention to cleanliness, but the steps are straightforward. This guide will walk you through the benefits of ginger, the equipment you need, and the exact steps to brew your own batch from scratch.
The Power of Ginger: Why Drink It?
Ginger root has been utilized across the globe for centuries, both in culinary dishes and for its well-documented properties. When fermented into wine, many of the core characteristics of ginger remain in the final beverage.
- Digestive Support: Ginger is widely recognized for its ability to help settle the stomach. It is frequently used to ease bloating, indigestion, and general stomach discomfort.
- Nausea Relief: Many people turn to ginger to calm feelings of nausea, whether from motion sickness or general upset stomachs.
- Warming Properties: Ginger has a natural heat. A small glass of ginger wine is known for creating a warming sensation in the chest and stomach, making it a highly popular drink during the cold winter months.
- Rich in Antioxidants: Fresh ginger contains compounds like gingerol, which have antioxidant properties that help protect the body’s cells from daily wear and tear.
- Immune System Support: Because of its natural properties, many people consume ginger-based drinks to help support their immune system during cold and flu season.
Choosing Your Ingredients
To get the best flavor, you need to start with the best components. Here is what you should know about the ingredients that make up your wine.
- Fresh Ginger Root: Always use fresh, firm ginger root. Avoid ginger that is soft, wrinkled, or has mold. The fresher the root, the sharper and more vibrant the flavor of your wine will be.
- Sugar: White granulated sugar is standard and will give you a clean, sharp ginger flavor. You can use brown sugar, but it will give the wine a darker color and a slightly molasses-like taste.
- Raisins: Ginger has no natural body or tannins. Chopped raisins are added to the recipe to provide nutrients for the yeast and to give the final wine a thicker, more pleasant mouthfeel.
- Lemons: Ginger wine needs acidity to balance the heavy amount of sugar used. Fresh lemon juice provides this balance and adds a bright citrus note.
- Wine Yeast: Do not use baking yeast. Buy a dedicated white wine yeast or champagne yeast from a brewing supply store. These yeasts are designed to survive in alcohol and will produce a much better flavor.
The Equipment List
Sanitation is the most important rule of home brewing. Any wild bacteria can ruin your batch. Before you begin, you need the right tools, and they must all be thoroughly cleaned and sanitized using a food-grade brewing sanitizer.
- Large Boiling Pot: You will need a pot large enough to hold at least 5 liters of water to boil your ginger.
- Primary Fermentation Bucket: A large, food-grade plastic bucket with a lid. This is where the initial, aggressive fermentation takes place.
- Glass Demijohn (Carboy): A glass jug (usually 4.5 to 5 liters) with a narrow neck used for the secondary, slower fermentation.
- Airlock and Bung: A small plastic device that fits into the top of the demijohn. It lets carbon dioxide escape without letting outside air or bugs in.
- Siphon Tube: A food-grade plastic hose used to transfer the liquid from the bucket to the glass jug without disturbing the sediment at the bottom.
- Glass Bottles and Corks: For storing your finished wine. You can use flip-top glass bottles for easier sealing.
The Homemade Ginger Wine Recipe
This recipe yields approximately 4.5 liters (one standard gallon) of ginger wine.
Ingredients:
- 500 grams (roughly 1 pound) of fresh ginger root
- 1.5 kilograms (about 3.3 pounds) of white sugar
- 250 grams (about 9 ounces) of raisins
- 3 large lemons
- 4.5 liters (1 gallon) of water
- 1 packet of white wine yeast
- 1 teaspoon of yeast nutrient (optional, but highly recommended)
Step 1: Prepare the Base
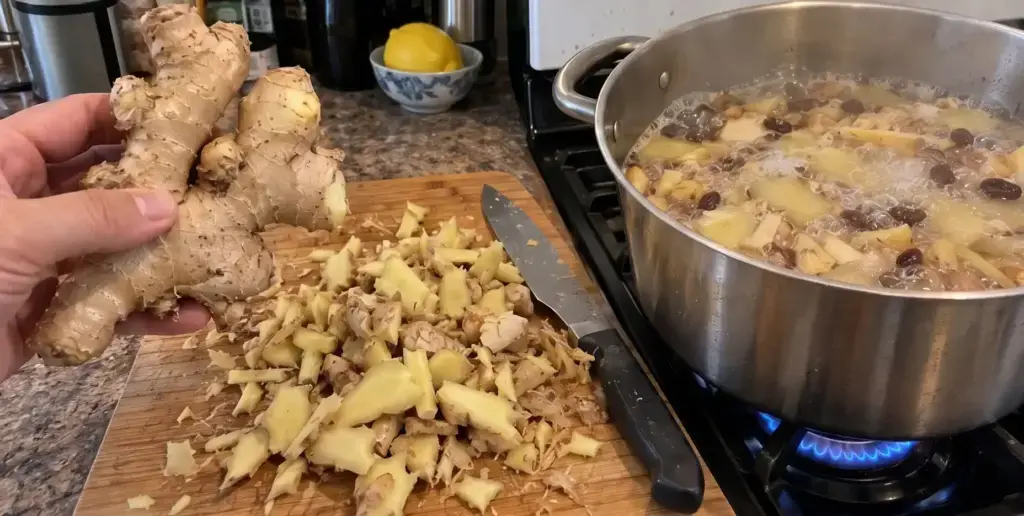
Wash the ginger root thoroughly. You do not need to peel it, but scrub away any dirt. Chop the ginger into small pieces or crush it using a heavy rolling pin. Chop the raisins into smaller pieces to expose their insides. Peel the rind from the lemons, being careful not to include the bitter white pith. Juice the lemons and set the juice aside in the refrigerator.
Step 2: The Boil
Place the chopped ginger, lemon rinds, and chopped raisins into your large pot. Add about 3 liters of the water. Bring the water to a rolling boil, then lower the heat and let it simmer gently for 30 to 45 minutes. This process extracts all the strong flavors and heat from the ginger root.
Step 3: Dissolve the Sugar
After simmering, turn off the heat. Pour the 1.5 kilograms of sugar slowly into the hot liquid, stirring continuously with a sanitized spoon until every single grain of sugar is completely dissolved.
Step 4: Cool and Transfer
Pour this hot mixture (including the solid ginger and raisins) directly into your sanitized primary fermentation bucket. Add the remaining cold water to help bring the temperature down. Wait until the liquid cools to room temperature (around 20°C to 24°C, or 68°F to 75°F). Do not add yeast while the liquid is hot, or you will kill the yeast.
Step 5: Pitch the Yeast
Once the liquid is cool, add the reserved lemon juice. Sprinkle the packet of wine yeast and the yeast nutrient over the surface of the liquid. Cover the bucket tightly with a clean cloth or a loosely fitted lid. Place the bucket in a warm, dark place.
Step 6: Primary Fermentation
Leave the bucket alone for 24 hours. After a day, you should see bubbles forming on the surface, which means the yeast is working. Stir the mixture gently once a day with a sanitized spoon for the next 5 to 7 days.
Step 7: Racking to Secondary Fermentation
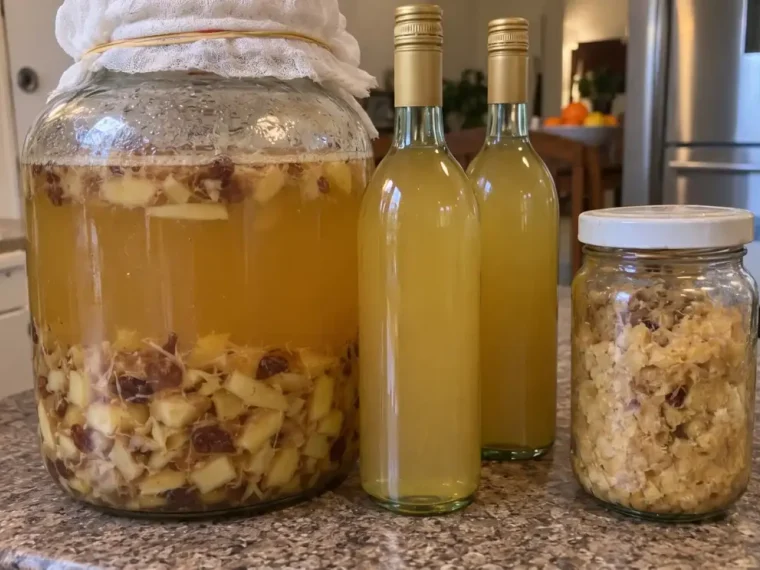
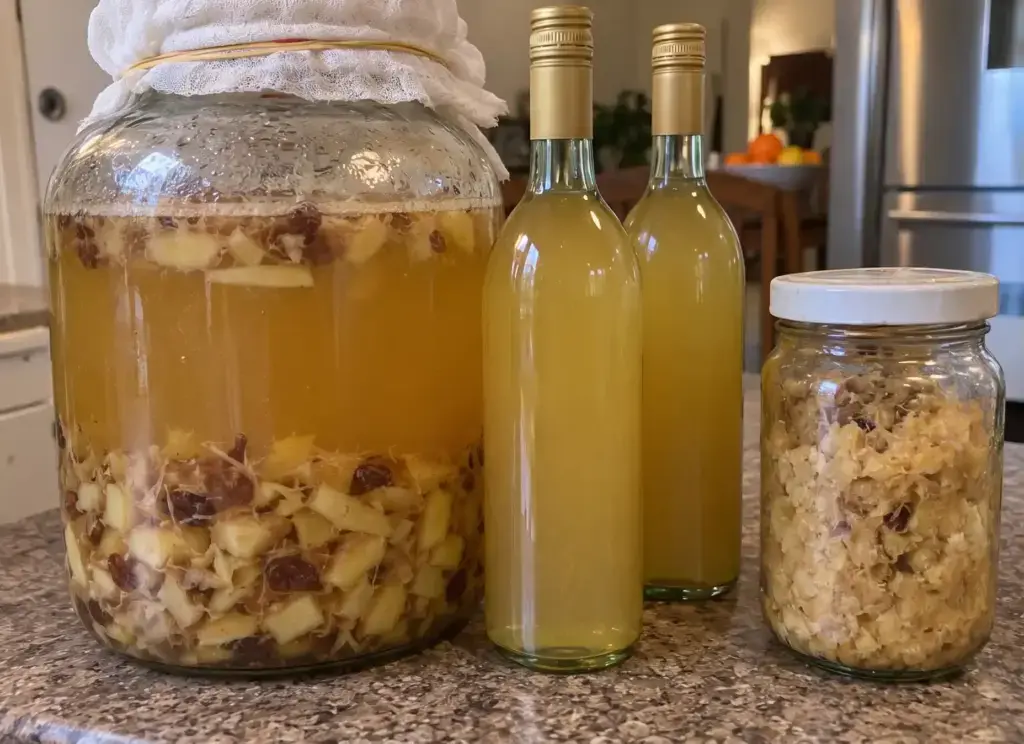
After a week, the aggressive bubbling will slow down. It is time to move the liquid away from the solid pieces of ginger and raisins. Use your siphon tube to carefully transfer the liquid from the bucket into your sanitized glass demijohn. Leave the solid mush at the bottom of the bucket behind. Fit the bung and airlock onto the demijohn. Ensure there is a little water in the airlock.
Step 8: The Waiting Game
Store the demijohn in a cool, dark place. You will see bubbles slowly passing through the airlock. Leave the wine here for at least two to three months. Over time, the yeast will settle to the bottom, and the cloudy liquid will slowly turn clear.
Step 9: Bottling
Once the wine is completely clear and no more bubbles have passed through the airlock for a few weeks, fermentation is finished. Siphon the clear wine into sanitized glass bottles, being very careful not to suck up the dead yeast sediment at the bottom of the jug. Cork or seal the bottles.
Step 10: Aging
Ginger wine can be drank immediately after bottling, but it will taste very harsh and sharp. For the best results, store the bottles in a cool, dark cupboard for at least six months. A year is even better. Aging smooths out the rough edges and blends the fiery ginger heat into a complex, sweet, and smooth drink.
Troubleshooting Common Issues
- The airlock is not bubbling: Make sure the bung is fitted tightly and there are no air leaks. If it is sealed tight but still not bubbling after 48 hours, the temperature might be too cold, or the yeast was pitched while the liquid was too hot.
- The wine will not clear up: Sometimes ginger wine remains cloudy due to pectin from the lemons. It is completely safe to drink cloudy wine, though it may not look as professional. You can buy a product called “pectic enzyme” from brewing stores to add to your next batch to prevent this.
- The wine is too dry or harsh: If the yeast consumes all the sugar, the wine will be very dry and highly alcoholic. You can stabilize the wine (using chemical stabilizers from a brew shop) and then stir in a little simple syrup before bottling to back-sweeten it to your taste.
How to Enjoy Your Ginger Wine
Once aged, your homemade ginger wine is a highly versatile drink.
- Neat: Serve it at room temperature in a small glass as a comforting, warming drink on a cold winter evening.
- Over Ice: Pour it over a large ice cube on a hot summer day for a refreshing, spicy cooler.
- The Whisky Mac: Mix equal parts of your homemade ginger wine with a good quality blended Scotch whisky. This is a classic, potent cocktail.
- With Mixers: Top a measure of ginger wine with sparkling water, club soda, or even ginger ale for a longer, lighter beverage.
- Cooking: A splash of ginger wine works wonderfully when deglazing a pan for a stir-fry sauce or added to a marinade for chicken or pork.
Making ginger wine requires just a few basic ingredients and the patience to let nature do its work. By following these steps and maintaining clean equipment, you can stock your pantry with a deeply flavorful, traditional beverage that you crafted entirely with your own hands.